Before we were married, it was easy to surprise Whitney with handmade gifts for birthdays, anniversaries and special occasions. I could hide whatever it was that I was working on without worrying about her finding it and I had the time to work on these little projects. Sorry to say, it’s been a long time since I’ve attempted to make anything besides breakfast for her in a long time.
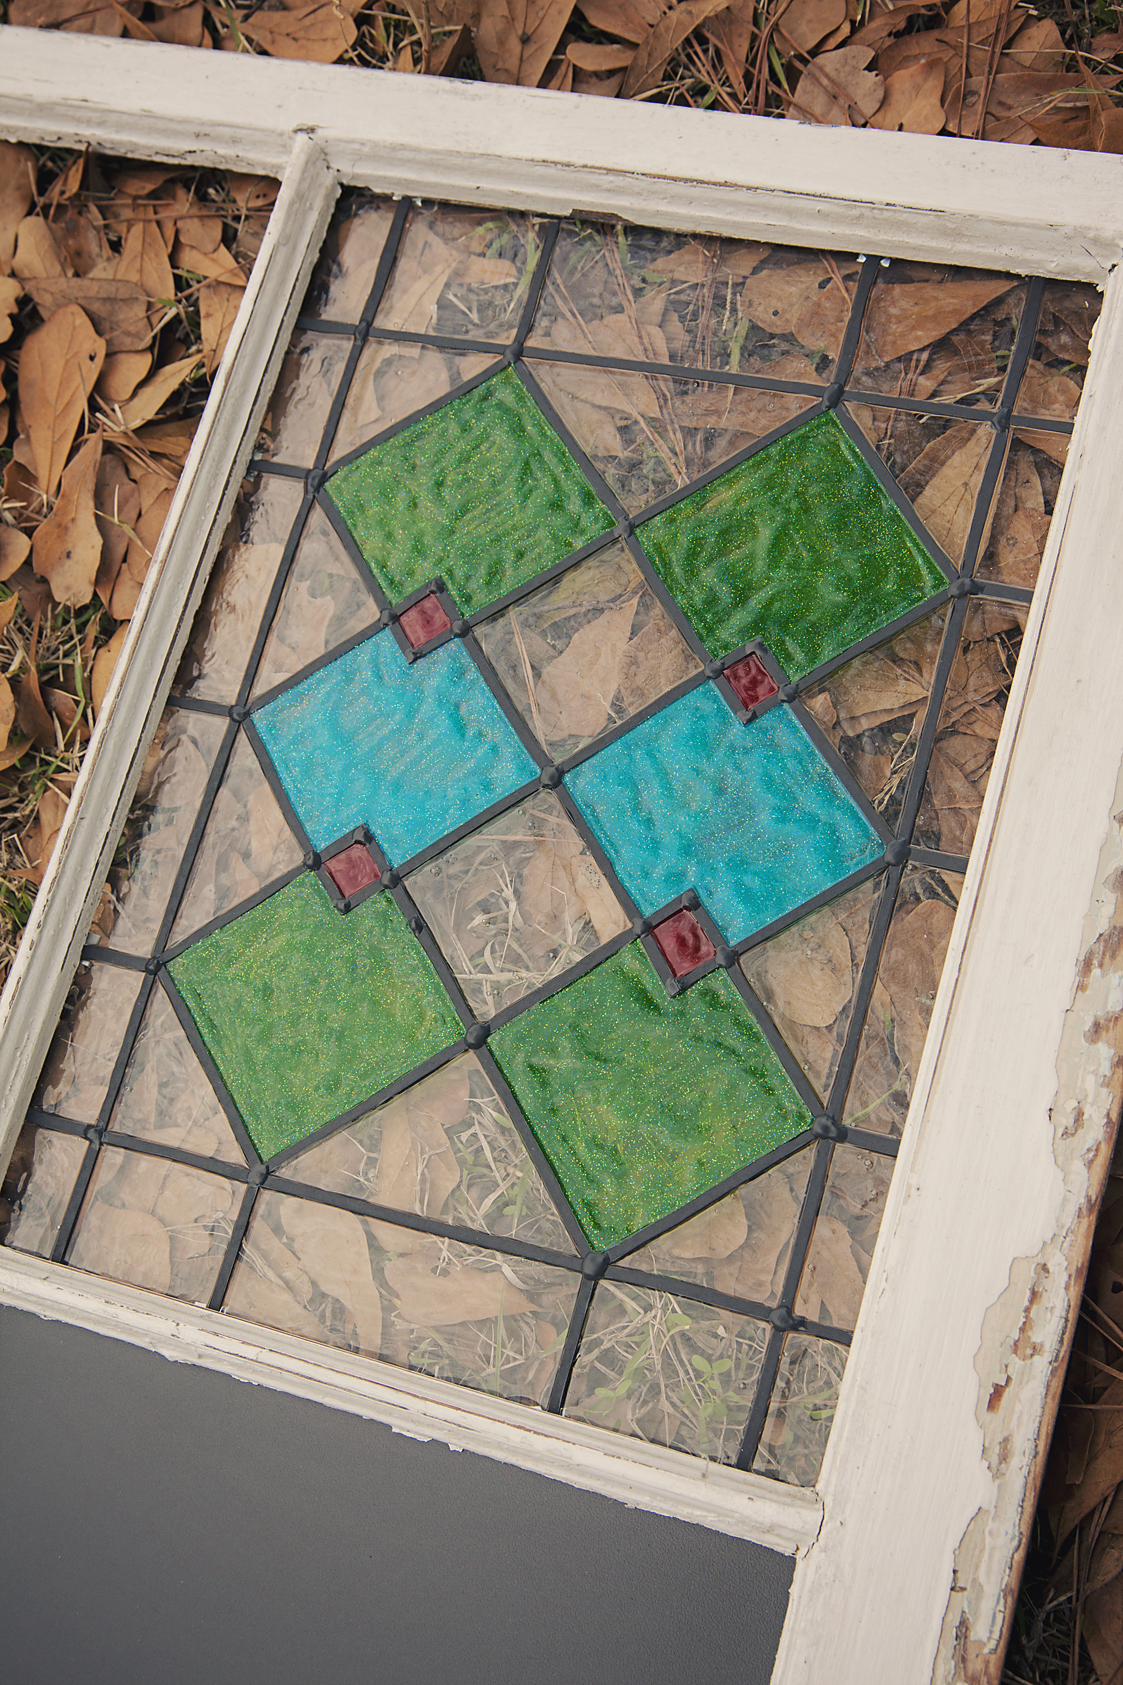
I was determined to change that this Christmas and create something special for her that she could actually use. I found this antique six pane window at a thrift store and instantly knew I had to give it some life.
 Every time Whitney runs across an old stained glass window while walking through the musky halls of an antique store, she has to stop and examine it. I figured, with this old window, I could recreate something much like what she loves so much to stop and analyze. It may not be the real deal, but it would be from the heart. And, if I played my cards just right, I could not only create a nifty piece of art for the wall but make something useful for the house as well.
After walking proudly to the resister with the window in hand, I endured multiple criticisms about the quality of my choice in merchandise.
“You sure that’s gonna fit?”
“How much calk do you have at home–‘cuz you’re gonna need it!”
“You know that window is missing a pane or two, right?”
“But are you sure that’s gonna fit!?”
I continued to hold my head high in spite of the peanut gallery, handed the cashier my money with a smile, and walked out the door dreaming of the unlimited possibilities that lay ahead of me.
When I got home, I began removing each pane of glass carefully by cutting back the thick layers of paint and caulk that the glass had collected from over the years with a utility knife.
Fortunately, I had some help with this process.
 Once they were removed, I lightly sanded down the frame of the window to detach any chipping paint.
 The beauty is truly in the little imperfections.


 I wanted to make the window a useful addition to our studio, so I decided to add a chalkboard to one pane and a cork board to another. Fortunately, we had a piece of chalkboard that we had removed from a frame we purchased for Zoey’s room. I cut it down to 10×14–the size of one window pane. I bought a piece of cork board from Hobby Lobby and did the same with it. The hard part of the project, I knew, was going to be recreating the stained glass windows that Whitney loved so much.
I drew up an antique-inspired 10×14 design on card stock and taped it to the back of two of the glass panes I had removed from the window frame. Using glass paint and Readi-Lead strips, I slowly created faux stained glass to put in the window frame.


 Once the paint had dried, I used glazier points on the back of the window frame to attach the “stained” glass, chalkboard and cork board.


 I decided that I wanted to add a shelf to the window frame to help with desk space in the studio. All I could find was a leftover piece of fencing I had laying around, so I cut it to the same width as the window frame.
 I wanted it to match as closely as a could, and fortunately I still had some paint from this project which I used to give the piece of fencing a skim coat.
 Once it was dry, I painted over it with a glossy white paint that I bought for the baseboard in our house. I let the board sit for a day to make sure it was completely dry, and then I sanded and distressed the board to give it a worn look to compliment the window frame.


 When that was complete, it was time to attach it to the bottom of the frame. I ran a tiny bead of gorilla glue along the back and secured it with screws.
 The only thing that was left was to sign it!
 Have you ever felt crafty at Christmas? What handmade gifts have you made for others? We’d love to know, tell us about them!